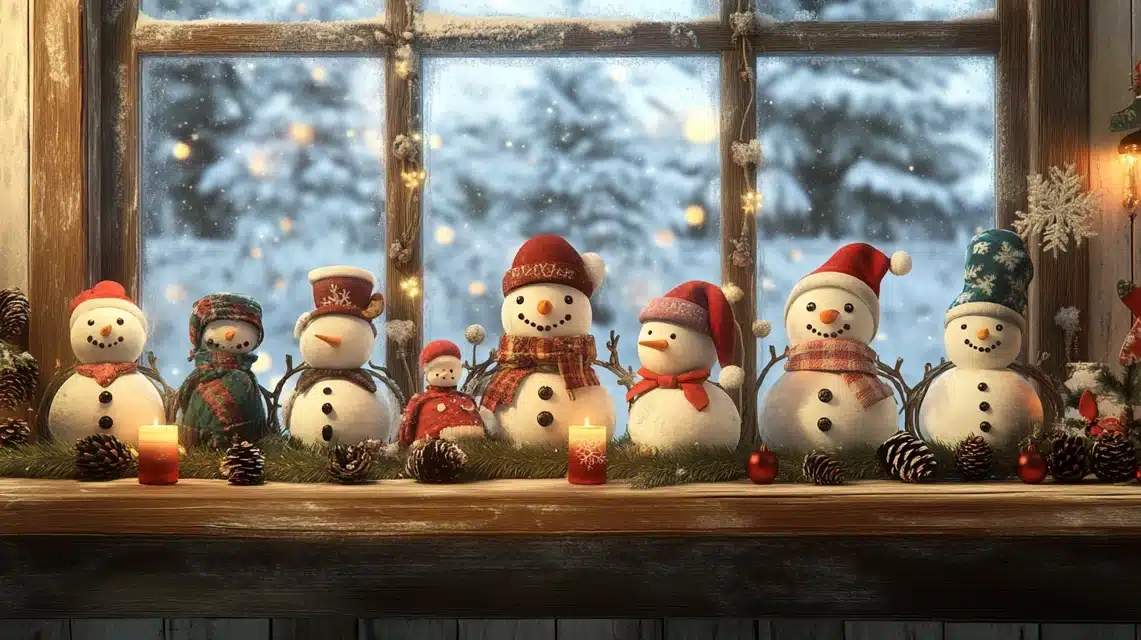
Making snowmen doesn’t have to wait for winter! Let me share some of my favorite indoor crafts that bring smiles year-round.
These projects are perfect for anyone who wants to add some winter charm to their home without spending much money.
I’ve tested these ideas myself, and the best part is that you can make them your own way.
These DIY snowmen will add warmth and cheer to your space, from wall decorations to small ornaments.
All you need are some basic items and a bit of time to create these sweet decorations.
Guide 1: Rustic Snowman Wall Shelf
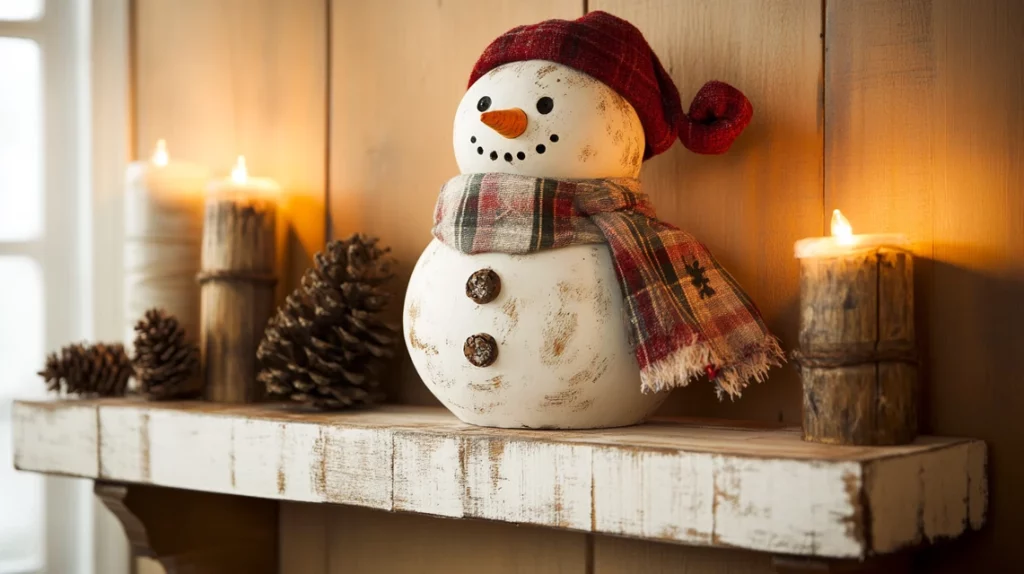
When I first tried this craft, I couldn’t believe how a simple wall shelf could look so cute! This is one of my go-to winter decorations, and guests always compliment me on it.
What You’ll Need
- 1 Dollar Tree wall shelf (wooden)
- White paint for the base coat
- Small paintbrushes
- Soft fabric scraps in winter colors
- Hot glue gun and glue sticks
- Scissors
- Sandpaper (medium grit)
- Black paint for features
- Orange paint for the nose
Making Your Snowman
- Start by cleaning your shelf with a damp cloth and let it dry
- Sand the surface until it feels smooth
- Paint the entire shelf white – I usually do two coats
- Once dry, wrap your chosen fabric around the board’s edges
- Secure the fabric with hot glue, making sure the edges are neat
- Make a small scarf from fabric scraps
- Paint the face features: small dots for eyes, carrot-shaped nose
Helpful Tips
I learned through trial and error that it’s better to paint before adding fabric.
Keep your glue gun on low heat to avoid fabric burn marks. For the face, I like to make tiny pencil marks first – it helps get the features just right.
If you make a mistake, don’t worry! A quick dab of white paint covers most goofs.
Guide 2: Painting a Snowman’s Face with Charming Details

Let me share my secret tricks for making the sweetest snowman faces! After lots of practice, I’ve found some easy ways to make each face look special and full of character.
What You’ll Need
- Small paintbrushes (different sizes)
- White acrylic paint
- Black acrylic paint
- Orange acrylic paint
- Pink blush or craft paint
- Soft makeup brush
- Pencil for sketching
- Paper towels
- Clean water for brushes
Making the Magic Happen
- Start with a white surface – make sure it’s fully dry
- Draw light pencil marks for eyes, nose, and smile placement
- Paint small round eyes using black paint
- Add a triangle-shaped carrot nose in orange
- Create a sweet smile with tiny black dots
- Let all paint dry completely
- Brush on pink blush in circles for rosy cheeks
- Seal with clear coat if needed
My Personal Tips
My best faces came after learning to keep things simple.
Space the eyes wider than you think – it makes the face look friendlier. For rosy cheeks, build up color slowly with light layers.
If your hands shake while painting, rest your elbow on the table – this helps make steadier lines.
Guide 3: DIY Snowman Garland
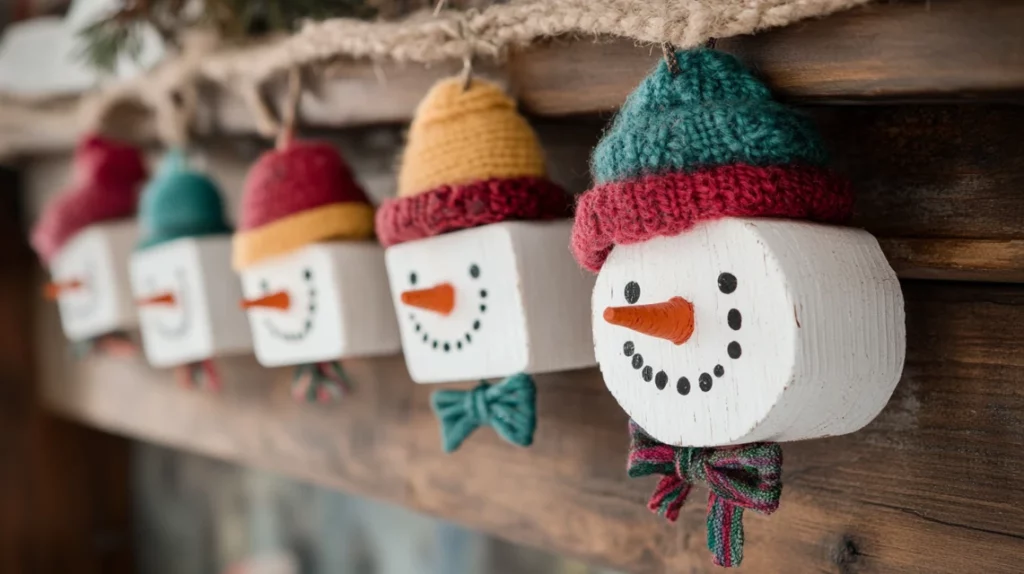
I love making these garlands because each block tells its own story! This project quickly became my family’s favorite, and now we make a new one every year with different patterns.
What You’ll Need
- Old wooden signs or blocks
- White paint (matte works best)
- Black paint for faces
- Strong sandpaper
- Hot glue gun and sticks
- Yarn in winter colors
- String for connecting blocks
- Small buttons (optional)
- Clean rags for paint cleanup
- Measuring tape or ruler
Putting It Together
- Take apart old signs carefully
- Sand each block until smooth
- Clean off dust with a damp cloth
- Paint all blocks white (2-3 coats)
- Space blocks evenly on your work surface
- Paint small faces on each block
- Make tiny yarn hats for each block
- String blocks together with 2-inch gaps
- Add small bows or buttons between blocks
My Time-Saving Tips
I found that laying out all blocks before painting helps plan the spacing better.
Keep a paper plate handy for your paint – it makes cleanup easier.
Work in small groups of 3-4 blocks at a time to keep the project from feeling too big. If yarn starts to fray, wrap the end with clear tape before threading.
Guide 4: Decorating a Dollar Tree Hat
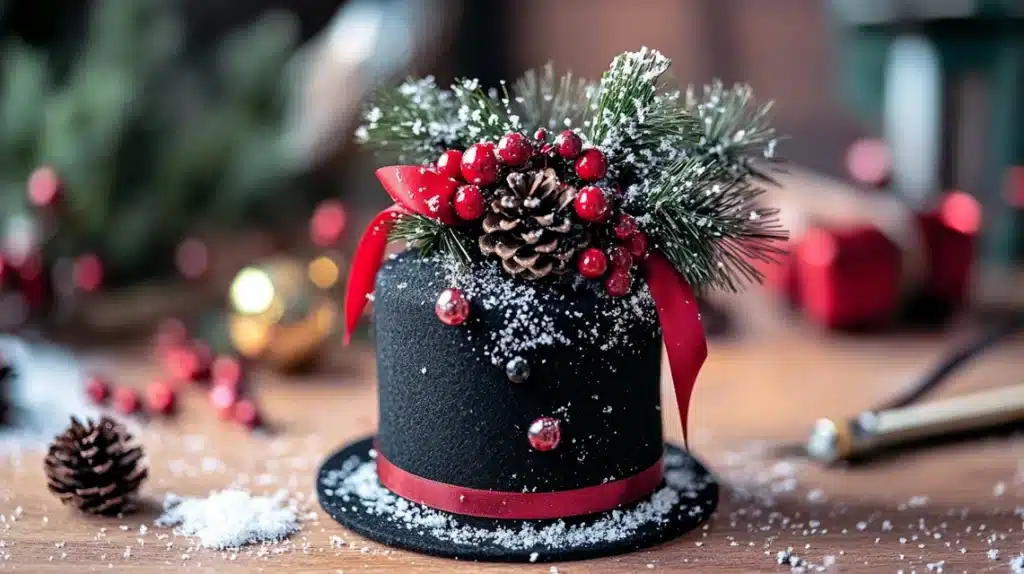
Making snowman hats is one of my easiest winter projects! These little hats add such a sweet touch to any winter display.
I started making these when I needed quick decorations for my kitchen shelf, and now I make extras to give as gifts.
What You’ll Need
- Dollar Tree mini black hat
- Black acrylic paint
- Small winter berries
- White craft snow
- Small pinecones
- Hot glue gun and sticks
- Small ribbon pieces
- Tiny bells
- Clean workspace cover
Making It Special
- Clean the hat surface with a dry cloth
- Paint the hat black – use thin coats
- Let each coat dry fully
- Start with bigger items like pinecones
- Add berries in small groups
- Sprinkle snow around items
- Tie a small ribbon at the base
- Add a bell at the ribbon’s center
My Quick Tips
Start decorating from the back – it helps hide any glue marks.
Keep decorations close to the hat’s band to prevent tipping. I always make a few extra berries clusters since they tend to fall off with handling.
Guide 5: Shelf-Sitting Snowman Craft
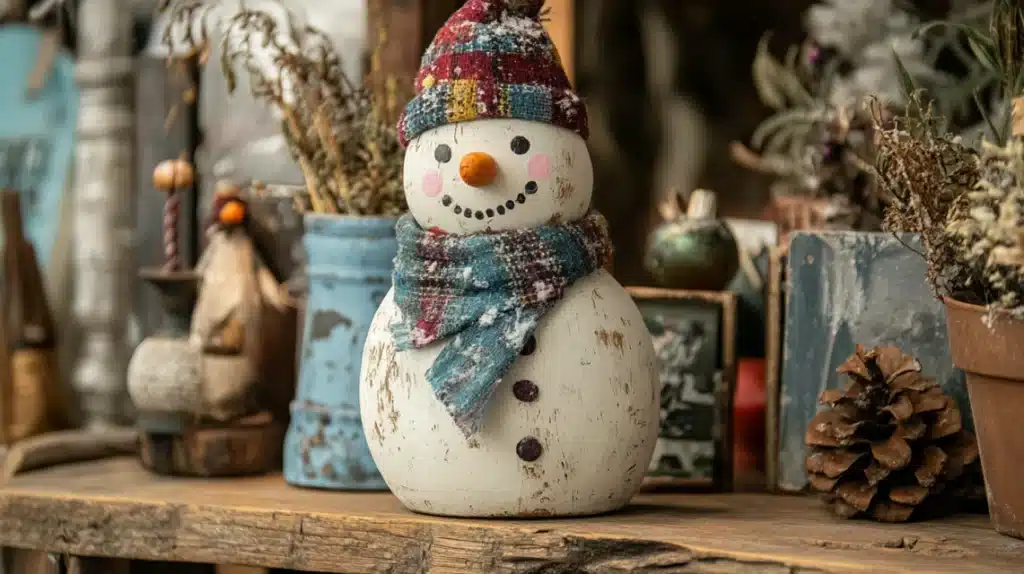
This little snowman brings so much joy to my shelf! It’s perfect for small spaces and takes less than an hour to make.
What You’ll Need
- Mini wooden cutting board
- White acrylic paint
- Small fabric piece for scarf
- Mini decorated hat
- Black paint for face
- Orange paint for nose
- Hot glue gun
- Paintbrushes
- Paper towels
Creating Your Friend
- Clean the cutting board well
- Apply white paint in thin layers
- Let each layer dry completely
- Paint the face features
- Cut a small scarf from fabric
- Wrap and glue the scarf
- Attach the hat last
- Add any final touches
Display Ideas and Tips
My favorite spot is near other winter items.
Use museum putty to keep it steady on narrow shelves.
If your cutting board has a handle, turn it upside down for a different shape.
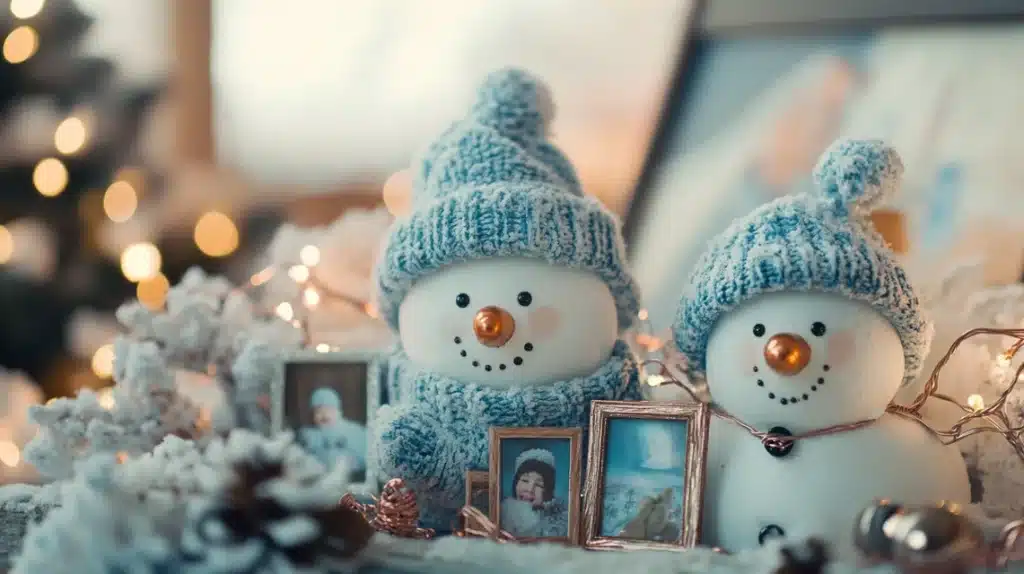
Creative Ways to Display Your Snowman DIYs
I’ve tried many spots around my house for these little winter friends!
My favorite setup puts small snowmen on floating shelves near my front door. They make everyone smile when they walk in.
I group three different-sized snowmen as a table centerpiece for my dining room – it works all winter long.
I hang the garlands above windows when space is tight, letting them catch the winter light. In my kitchen, the tiny snowmen sit perfectly between cookbooks and canisters.
Mix different heights and sizes to create depth in your display.
Budget-Friendly Snowman Crafting Hacks
Let me share my money-saving tricks! I get most supplies from Dollar Tree and save bits and pieces all year.
Old white socks make perfect mini hats – just cut and roll the edges.
I keep fabric scraps from old clothes for scarves and accessories.
Clear food containers become perfect snow globes.
Paper rolls turn into small snowmen with white paint. Brown paper bags make great rustic bases.
Even empty tin cans, painted white, become charming snowman containers. These simple swaps help make crafting more affordable.
Maintenance Tips for Your DIY Snowman Decorations
Keeping your snowmen looking fresh is easy with these tips I’ve learned.
Store them in plastic bins with tissue paper between each piece. Keep them in cool, dry spots – heat can warp paint and glue.
Clean them gently with a soft brush before storing them.
Touch up any chips with matching paint right away. A light spray with water repellent helps fabric parts stay clean.
Put small ones in zipper bags with notes about when you made them.
Check stored items monthly for any issues.
Eco-Friendly Snowman Crafts
My friends always ask how I make earth-friendly winter crafts.
I use fallen tree branches cut into circles for ornaments. Old cardboard boxes become sturdy bases.
Cotton balls replace synthetic snow. White paper from old mail works great for paper crafts.
Natural twine makes perfect scarves. Dried orange peels create sweet decorations. I save buttons from old clothes for eyes and decorations.
Tea boxes become mini display stands. White chalk paint gives a clean look without harsh chemicals.
History and Symbolism of Snowmen in Holiday Decor
Our frosty friends have made people smile for hundreds of years.
Snowmen first showed up in winter art during the Middle Ages in Europe. They became winter celebration symbols in many places.
In Japan, people make special snow figures called Yukidaruma for good luck.
German families started putting snowman decorations on trees in the 1800s.
These days, snowmen appear everywhere during winter. They remind us to find joy on cold days. Different countries add their special touches to snowman traditions.
Suggested Add-Ons for Personalization
Try writing family names on the bases with paint pens. Small battery lights tucked behind scarves add a warm glow: paint dates or special messages on wood slice bases.
Use tiny photos in frames as decorations. Wrap thin copper wire lights around garlands.
Paint them in soft blues or silvers for something different.
Add small bells that ring when doors open. Use tiny mirrors for icy effects.
Make matching sets for friends with their favorite colors. Each extra touch makes them more special.
Conclusion
Making these snowman crafts has brought so much happiness to my home, and I hope they’ll bring joy to yours, too!
From my first try at the wall shelf (which wasn’t perfect but made me smile) to now crafting with my family, each project feels special.
Don’t worry about making everything look just right – that’s what makes handmade decorations so wonderful.
Start with the simple Dollar Tree crafts and have fun trying new ideas.
Remember, these sweet snow friends aren’t just decorations; they’re memories we make along the way. Happy crafting!
Frequently Asked Questions
How to make a realistic snowman?
Wait for fresh snow, roll three different-sized balls of snow, stack them biggest to smallest, add carrot nose, coal or buttons for eyes, and sticks for arms.
How do you make a mini snowman out of marshmallows?
Stack three marshmallows using toothpicks, draw a face with food markers, add pretzel stick arms, and use a small cookie or candy for the hat.